Happy New Year everyone:) After looking through the gifts I gave and received this year, it's to no surprise that maybe 10% of items were actually made right here at home. This is such a passionate subject for me so I'm going to blog about it. (Lucky you, reader) ;-)
Adam and I are all about buying and supporting local business. On the downside, it does make items more expensive. On the upside, usually the quality is superb. It is unbelievable how difficult it is to find things made in the USA. Recently, my cousin from Spain had her first baby girl. My grandma asked all of us to buy her a gift that we could pack into a box and ship off to Barcelona. The only requirement she asked, was that every single thing be made in the USA. So, Adam and I went on our search for cute San Francisco baby onesies. We walked into stores that had adorable clothes with the Golden Gate Bridge and Haight-Ashbury signs sprawled across them. When we asked the owners if they carried anything made in the United States, some of them didn't even know! After we picked out at least 5 different outfits and checked their tags to find them all being made in mostly China and one in Indonesia, we thanked them and walked out empty handed. We tried 4 or 5 different stores until finally finding this super cute locally owned store, Wishbone.
My point on this subject is just to barely touch on the sole fact of how many more Americans we would have working, if we started buying here at home. Really, on the forefront of what we as consumers can do, is just a small amount. But, by buying local you're at least able to stimulate your community in the circle you live in. The big picture lies much deeper in a government and state level that is worsening every single day. For example, our new bay bridge (which connects the east bay area to San Francisco), is currently being built and contracted by China! The UGGS I just got for Christmas say Australian wool, made in China! The bottom of your dishes, China! Your TV, China! The tags on most clothes you wear, China, China, China! You'll also find Vietnam and other Asian countries, but USA or even Europe, is slim to none. The reasoning behind all of this is because the people in these countries will work for cents, and it's all about the green. Money is the number one priority and it's a shame because this is where slave labor comes into play. That Louis Vuitton purse I walk by every day, yup, slave labor. This is such a jumbled entry, but it's frustrating because the reality is that if you want to shop locally for good quality things, you have to pay more. Paying more isn't always feasible for some people, which is why Wallmart (which we have boycotted for a number of reasons) is a safe haven. Wallmart has run so many business out of business it's disgusting, not to mention the life insurance they take out on their elderly employees, ah! I could rant non stop about that corrupt corporation but for your sake, I'll stop.
My very last point ends at stores like Forever 21 and even Victoria's Secret, both of which I'm leaning further and further away from. Of course you won't find any of the junk in F21, made in America, but I've known that all along. It used to be a great store to buy a cheap dress that you'll only wear once because it will fall apart after one wash. But I'm OK with that because it's cheap crap. Now, it's expensive crap, no joke! I was in there last week and low quality tops hanging together by a couple threads are now double the price. I called a girlfriend right when I left (empty handed) and she agreed. We can't believe our once "go to" store for a night out is so over priced but the quality is still just as bad. Then, I order a $60 cotton dress from Victoria's Secret. When I got it, I couldn't believe what I had paid. It was super thin cotton, almost see through with a tag "Made in China". Not to mention their bras that used to hold together so well before it was such a huge franchise, now loosen up and fall apart after a wash or two. All of this circles back to the money and I get that. This world, unfortunately, is run in a lot of ways based on the quickest and cheapest method.
Do I have a solution? Not really. Will I still shop at both of these stores? Probably, but not as much as I used to. I prefer to pay more for higher quality, and I've turned that way almost completely now. Although, even a $400 Burberry jacket I saw at Nordies the other day wasn't made in the USA either, clearly the quality was better. (cough cough slave labor) :( **Watch this documentary, "Santa's Workshop" on slave labor for a better understanding, we thought it put heaps into perspective.**
I guess all we can do is to try to put forth the effort to buy here at home when we can, because it will absolutely make a difference for local business. Just having the idea in your head is a step up from just buying buying buying, not caring at all who's hands are tediously (or not so tediously) working to make it. That is all. :)
December 30, 2011
December 16, 2011
DIY: Christmas Card Hanger

I titled this Christmas card hanger because it's that time of year when the cards start pouring in. I'm planning on hanging black and white photos on this after the holidays are over, so really, anything you would hang on your fridge you can hang on this. Adam and I took apart a pallet and individually dry painted them with white paint. Our walls are cream with white crown molding so I thought it would be a nice match.

After you have your slabs of wood, all you need is twine or a thick string of some sort, staple gun, wire and a hook. Adam added a hook to the wall and wire to the back of the wood to hang. (Just like you would hang a picture frame). Then, we stapled the twine to the back of the wood and wrapped it over and over again, stapling as we went to keep it super tight. Tighter the string the better, so the cards don't slip out. And 2 people for this really helped so one person could staple and one person could hold the twine tight. We put these on a bare wall in our hallway, next to our kitchen. Hope you like it too:)

Looks like a botched job but we couldn't get the large screws out! Still hangs straight though;)


I zig zagged a few times to fit the twine snug around the cards.

Here's the hook we used on the wall.

And there you have it.
December 10, 2011
52 reasons
This has been the most meaningful gift I have ever given anyone which makes me extremely excited to share it! Something I haven't shared on facebook or talked to anyone about except my close friends and family, is that recently, a very close family member was diagnosed with a super scary form of cancer. I won't even go into depth on here because it's too painful and for me, being private about family things is important. If you have ever had the "C" word bombard itself into your family, you understand how hard it is just to feel like you're helping. For weeks, I didn't know what I could possibly do to help her. Then, lovely pinterest gave me a great idea.

I found a blue deck of cards (Blue because for us, it's a fighting color. All of our toe nails are painted blue:) and asked my entire family and her closest friends to help me in what I think is such a remarkable gift. Everyone gave me reasons why they love her. The outpour was bigger than I ever imagined! I ran out of cards and even debated using 2 decks. I wrote out the reasons on pieces of paper, and glued them on each card, punched a hole in the top, and found an old shower curtain ring to hold them all together. I cried while receiving email after email, both from those who raised me and those I had never met. This whole time I knew I was doing something special for someone I love, but really, she was doing something in me I never would have expected.


I found a blue deck of cards (Blue because for us, it's a fighting color. All of our toe nails are painted blue:) and asked my entire family and her closest friends to help me in what I think is such a remarkable gift. Everyone gave me reasons why they love her. The outpour was bigger than I ever imagined! I ran out of cards and even debated using 2 decks. I wrote out the reasons on pieces of paper, and glued them on each card, punched a hole in the top, and found an old shower curtain ring to hold them all together. I cried while receiving email after email, both from those who raised me and those I had never met. This whole time I knew I was doing something special for someone I love, but really, she was doing something in me I never would have expected.


November 26, 2011
The BEST Irish Coffee
I really didn't find the time to write any Thanksgiving posts, so today I'll try to make up for it. We absolutely love Irish Coffee, probably because we are obsessed with whiskey and Bailey's (preferably together)! These are pretty over priced at most restaurants, so we went to Costco and bought huge bottles of both. ;) We also found a set of coffee mugs for $1 each, at Ross (talk about a bargain).

We try never to skimp on our coffee, grinding only as needed and freezing the whole beans to keep them super fresh. Adam and I love World Market & Trader Joe's coffee best, as both are really yummy and affordable. Also, we don't own a coffee maker, we press it each time and I promise you, with these 3 steps (freezing, grinding, pressing), you will absolutely taste a difference and may even obtain a new appreciation for the stuff! So here are the proportions we found to work best for Irish Coffee:
Pour yourself a healthy cup of coffee. Add 1 tablespoon of whiskey (we use Jameson because that's what the Irish do!) and 1 tablespoon of Bailey's. Top with whip cream. (you can make your own using heavy cream which we didn't do in the photo below, but have before). There you have it. Super easy, the proportions taste just perfect, definitely not too strong but just right. This just reminds me of the holidays so we've been drinking it most Saturday mornings for the last few weeks now. Hope you like it too. :)


Pour yourself a healthy cup of coffee. Add 1 tablespoon of whiskey (we use Jameson because that's what the Irish do!) and 1 tablespoon of Bailey's. Top with whip cream. (you can make your own using heavy cream which we didn't do in the photo below, but have before). There you have it. Super easy, the proportions taste just perfect, definitely not too strong but just right. This just reminds me of the holidays so we've been drinking it most Saturday mornings for the last few weeks now. Hope you like it too. :)

November 20, 2011
current playlist
It's a rainy Sunday here in San Francisco today. Crock pot dish cookin as I type, and a little bit of cleaning is what I'll be doing. Here are a few songs on my playlist.... Enjoy :)


Create a MySpace Playlist at MixPod.com

Create a MySpace Playlist at MixPod.com
November 15, 2011
Apple Crisps
These are such a healthy and easy snack. All you need are apples and cinnamon, bake at 250 for 2 hours, maybe more, since not all ovens are exact. Be sure not to slice the apples too thin, as they will burn and cook much quicker than the rest. Cut out the center core, sprinkle cinnamon and bake!
As always, I try give credit back to the original blog when it wasn't my idea. BUT, I have been searching everywhere and can't find the original recipe! Silly Pinterest, with all it's recipes that we love so much;) Some call for a higher baking temp for a shorter time or white sugar to be mixed with the cinnamon. I will admit that this is harder than it looks and I attempted this 3 times before getting it right. Here are a few hints that I wish I knew first: *Don't slice too thin, even though some recipes suggest to. Mine burned right away and cooked much faster than the thicker slices. *Don't add butter or even oil... it burned mine almost instantly, and that just adds way more calories. *I didn't add any white or brown sugar, as apples are sweet enough and cinnamon is pretty overpowering. (And, I'm a dental hygienist).


As always, I try give credit back to the original blog when it wasn't my idea. BUT, I have been searching everywhere and can't find the original recipe! Silly Pinterest, with all it's recipes that we love so much;) Some call for a higher baking temp for a shorter time or white sugar to be mixed with the cinnamon. I will admit that this is harder than it looks and I attempted this 3 times before getting it right. Here are a few hints that I wish I knew first: *Don't slice too thin, even though some recipes suggest to. Mine burned right away and cooked much faster than the thicker slices. *Don't add butter or even oil... it burned mine almost instantly, and that just adds way more calories. *I didn't add any white or brown sugar, as apples are sweet enough and cinnamon is pretty overpowering. (And, I'm a dental hygienist).


And I promise they taste much better than they look ;)
November 13, 2011
fav things

*Necklace/Earring hanger I bought in Barcelona. Just the right amount of color ;)
*Moroccan Oil- This is an absolute Godsend. It makes your hair smell like you're on a tropical island and keeps it's super soft after you straighten. I apply it before I blow dry and after I straighten for shine;)
*Bio Oil- I watched an interview by Jessica Alba when I was in high school talking about her flawless skin. She said her secret was to simply apply oil to her body every single day after she took a shower. Go look at her skin and see how radiant and healthy it always looks! She didn't give a specific brand (I know Neutrogena is much cheaper and works well), but I love Bio Oil. It claims it works against wrinkles, stretch marks, scars, dehydrated skin, and uneven skin tone. I wipe it all over my body every single time I get out of the shower, and sometime blot it under my eyes before bed. It's especially good in place of a lotion, to be rubbed all over your hands. They age quick, you know!
* Silver bracelet from the North of Africa. Our 2005 trip to Tunisia, Africa to be exact. I bought this for the equivalent of 50 cents for me and a girlfriend; it goes with just about everything;)
*Nirvana Candles~ they come in lots of scents, sizes, and encouraging words. I have a couple on my bedside table and if you light a few, it's just the right amount of light for reading.
November 12, 2011
Shabby Chic
Excited to show you all our new purchase! There are only 2 items of which I have spent a lot of money on, but felt 100% happy and satisfied I did. There is nothing worse than splurging on something way too over priced, not being able to take it back, only "sorta liking it", and living with the guilty feeling of "I never could have afforded that in the first place, WHY did I buy it?", and now you're eating rice until you get paid again. Well, this is the 3rd item I've spent that was probably a bit 'out of our budget', but that I know I will take to every home we move to, and will keep forever:


I've had my eye on these 2 side tables for our bedroom at my fav store, for at least 3 months. When I went back to find them about a month ago, Donna the owner, told me they were already purchased and on hold in the back. Well, last weekend, Adam and I saw them in the window again and got really excited but I knew they were out of our price range (the pair for $400). We went in anyway, looked around, and decided we really couldn't spend that much. So today, a week later, we went back and saw them still sitting in the window. I told Adam how much I still loved them and could picture them in our bedroom. Adam decided to bargain with her since we have already spent so much money in her store, his girlfriend really loves them, blah blah. Well, it worked! She took $100 off . She informed us that the woman who put them on hold, never came to pick them up, and that she felt they were meant to be in my hands since she could tell how much I wanted them. Sometimes it's hard to not let money get in the way of something you really love, but we decided to cut back on other things in order to make the splurge. I hope to be able to distress furniture as well as this artist did, but we sure did a good job HERE, when I go back and compare. If you're a shabby chic loving person like me, good luck in your search! Try inputting "shabby chic" in your craigslist search and see what you come up with... we have had good luck with that too, but that's another blog spot.... ;)

November 11, 2011
Chicken Tortilla Soup
Our rainy and chilly Friday night included us eating a delicious bowl of chicken tortilla soup, Adam playing "Call of Duty" (his bday present to himself;), and me blogging and sipping on pinot! Sounds pretty perfect to me. This soup is so yummy and super easy, but you'll need a crock pot. We finally bit the bullet and bought an 8 quart for around $60, which is about middle range. There are so many recipes you can do in this thing, we are obsessed!
I knew I wanted to try making chicken tortilla because it's always been one of my favorite soups. After searching on Pinterest and google, this recipe came up the most. So we gave it a try and it was amazing. Yes, AHHHHmazing. Click on the link for all the ingredients and how to make the tortilla strips. We started ours when we woke up, went out and ran errands, and it was done it about 7 hours when we got home. We added a mexican cerveza to the mix, from Trader Joes, appropriately called Trader Jose's. Enjoy!

I knew I wanted to try making chicken tortilla because it's always been one of my favorite soups. After searching on Pinterest and google, this recipe came up the most. So we gave it a try and it was amazing. Yes, AHHHHmazing. Click on the link for all the ingredients and how to make the tortilla strips. We started ours when we woke up, went out and ran errands, and it was done it about 7 hours when we got home. We added a mexican cerveza to the mix, from Trader Joes, appropriately called Trader Jose's. Enjoy!

November 9, 2011
getaway
It's been awhile since I just rambled, so tonight is the night. (Lucky you)! I don't know how many times I've wandered off into lost thought about dropping all of my priorities and taking off. Escaping and making a drastic change of scenery to a place I've never been and where no one knows my name. My absolute dream would be to spin a globe around in a circle and lightly drag my finger on it until it stops; booking that plane ticket wherever I land. (As long as it's nowhere near the middle east or North Africa, Nepal-ish area, or North Korea of course;) I'm sure I could x-nay a few more countries where single women should not be traveling alone, but you get the idea). No cameras would be allowed, because this trip would be for my memory only. A journal would be the only way to document anything, and when I got home, I wouldn't share it with anyone. As you can see, I've mapped this out a few times.


I'm so fortunate to have a man who allows me to have these far fetched ideas while still knowing how much I love him as well as holding onto his own confidence. Our bond is stronger than anything and he knows there's nothing that could ever break us. Adam gives me a sense of security, confidence, comfort, and just that feeling that "we can do anything as long as we're together". I'm blessed, and thank God every single night of my life, for giving this perfect man to me. None of that takes away however, the pure fact of just how independent I really am. I'm extremely self sufficient and have never had the feeling of dependence on another person. My parents taught my sister and I to be strong women and that "no man will make you happy, if you're not happy first!" I have found a world of truth in that.
I have no problem going to a bar in the middle of the day, ordering a drink and sitting alone with a really good book. (cough cough -aussie land)! I have definitely hopped in my car while being bored, with absolutely no where to go, listening to my favorite CD, while heading north on PCH 101. Being totally alone is a necessity for me, and a part of me that I enjoy tapping into at times.
Although my getaway plan is highly unlikely to happen at this point in my life, it is still fun to get lost in day dreams. But we think it's really important for each of us to have our space and alone time, not referring to girls or guys nights, but just being totally solo. There are heaps of things you can figure out about yourself when both your computer and cell phone are turned off. A book, or a walk to a new place, no music or distractions... now I'm going into my happy place again. Where's yours? Try a media off approach. We've made a pact to start doing this once a month, for at least a couple hours. May sound odd to others, but to us, we're actually really excited about it. :)

November 4, 2011
DIY: Floating Vase
This is by far one of the most practical DIY projects for our apartment! I have 2 cats, just over a year old, with an insane amount of energy. Every time Adam brings me home flowers, the cats will ALWAYS knock over the vase or chew on the petals. I was blog-browsing one day and saw this from one of my fav sites. So, I made it! It took less than 5 minutes and cost less than 5 bucks!


First, I found a piece of scrap wood at the hardware store. I had some paint lying around but didn't really like either color, so I mixed a dark greenish with an off white.

I dry brushed (barely dipping the brush in paint and wiping off most of it, to get a light dry coat), the wood piece sloppily. Dry brushing dries really quick, and I wanted some wood to show through.

Center a mason jar in the middle of the wood and drill 2 holes on either side.

Wrap metal wire around the lip of the jar a few times until it feels snug. Slip the wire through the 2 holes and secure it in the back by twisting it really tight. Cut excess wire.

Drill 2 more holes on the top of the wood and slip wire through them, creating a hanger. I just twisted the wire to secure it in place and it worked. Find a wall in your house that needs a little color, and hang!

Remember, you can click on the photos to enlarge them:)
Happy DIY-ing!
October 31, 2011
Happy Halloween!
I hope everyone had fun celebrating this weekend! My girlfriend had a dinner party, complete with pumpkin carving and her spiked apple cider recipe, along with a last minute decision to rage the closets and head to the nearest dive bar. Tonight we may attend a block party or stay at my family's house to hand out candy. Whatever you decide to do, enjoy it and be safe! Here are a couple festive things we had around the apartment to roll in Fall. (although it's way too hot here at the moment for that cute scarf and sweater combo. But I'm not complaining ;)


World Market is one of my absolute favorite stores because it's affordable and I get weekly coupons on top of the smokin' deals. Pumpkin potpourri, pumpkin candle, and Ed Hardy Sangria.

October 21, 2011
keep young
This past weekend, my girlfriend of 22 years tied the knot. My parents, sister and brother all attended which made for such a special time with family and close friends. I'll touch more on weddings later, but I wanted to make this post about my gorgeous little brother, Brian. He's almost 12 and just started middle school. But he's unlike most pre-teens, still so innocent and loves his sisters without being embarrassed about it. (I wonder how long this will last?!) He also loves my SLR camera and is taking better pictures with it than I ever could. I wanted to share these because it's neat to look at the world from a 6th grade point of view, and as I was flipping through these I thought, "I never would have taken that, this is so cool." This kid keeps me young and keeps me laughing hysterically every time I'm with him. I forget that I'm 26 and for a minute I get to see the simplicity of life. So, with that said, what keeps you young? I feel like this is such an important question that is often ignored, or rarely thought about. But what a liberating feeling it is to be young again... even for a minute. :)


October 7, 2011
a toast to Pittsburgh
I've been told that if you were to eat breakfast, lunch and dinner out, every single night for 5 years in San Francisco, you wouldn't even be able to put a dent into the good food and restaurants that this city is littered with. That being said, we are trying to eat out a couple times a week, but it's hard to choose with all the recommendations we continuously get! It makes it even more hard to choose when you are "foodies" like us. So, to make it easy, we spent a Saturday here at a Pittsburgh Bar in North Beach. It's called Giordano Bros, and if you've been to Pittsburgh, you're familiar with the oh so popular, Primanti Bros. Well this bar is a clone of that, with the owners being from Pittsburgh. They recreate the Primanti sandwhich, have heaps of PA beer on tap (although the one below is a local SF brew), and famous photos of Pittsburgh athletes just to prove how legit they are.


October 5, 2011
happy here
Trying to hop on the blog wagon and really start doing this much more frequently because people are actually reading!! The stats are getting higher and I got my first email from a stranger, so thank you! Whether this gets any recognition or not, blogging is enjoyable and relaxing for me. :)
After living right smack in the middle of downtown San Francisco for 3 months now, everything as I know it to be, has changed. My southern California lifestyle has been forced to take a turn, although I will always do my best to keep that aspect of my life intact up here. For now, the sounds, the smells, and my view from our 4th floor tiny apartment are all different. In San Diego, we woke up to the smell of salt water, birds making me want to stay in bed awhile longer, and palm trees shading our two private balconies. Now, I smell rain because that's what happens here, the sounds are car horns and ambulances, and I can see a partial city skyline from my bed. Two very different worlds but I love them both. ;)
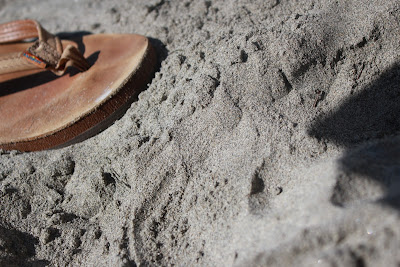
Our Indian summer usually comes mid September through October. You can bet the first 80 degree weekend we got, Adam and I headed straight for the beach. (Along with every other San Franciscan)


After living right smack in the middle of downtown San Francisco for 3 months now, everything as I know it to be, has changed. My southern California lifestyle has been forced to take a turn, although I will always do my best to keep that aspect of my life intact up here. For now, the sounds, the smells, and my view from our 4th floor tiny apartment are all different. In San Diego, we woke up to the smell of salt water, birds making me want to stay in bed awhile longer, and palm trees shading our two private balconies. Now, I smell rain because that's what happens here, the sounds are car horns and ambulances, and I can see a partial city skyline from my bed. Two very different worlds but I love them both. ;)
Our Indian summer usually comes mid September through October. You can bet the first 80 degree weekend we got, Adam and I headed straight for the beach. (Along with every other San Franciscan)

They really do appreciate nice beach weather since there are very few days out of the year where this actually happens. Adam and I then walked up to a couple trails to check out the view. The rugged coast line and pine trees are so different than Southern California.

For now, this is home and I'm happy here.
September 18, 2011
Asparagus wrapped in Prosciutto
This is the yummiest, easiest addition to a meal. And tastes so good, my mouth is watering as I type! You'll want to use a grill for this but if you don't have one, I suppose baking at around 350 would work too (haven't tried yet). Here's how you prep:
Trim ends of asparagus, and individually wrap each one with a half piece of prosciutto. I found that using a full piece is a little too bulky and thick. Place on a plate and drizzle olive oil all over them. Sprinkle with Trader Joe's 21 Seasoning Salute (my "go to" seasoning for just about EVERYTHING, so delicious).You really don't need any salt, as there is plenty in the prosciutto.
Put asparagus on the grill over a high heat for about 3 minutes then rotate and grill for another 2-3 minutes. Adam and I made these at a family BBQ and it was a big hit:) Enjoy!
*I came across this blog showing some other ideas for the TJ 21 Seasoning Salute. :)

September 12, 2011
Trader Joes Baby Bell Spicy Chicken Tacos
Adam and I love tacos, especially chicken and fish ones. This recipe can be made in the exact same way with either meat you choose. I shop at Trader Joes because there is always parking and the food is good and affordable. :) BUT, I have experienced several times not being able to find everything I need at TJ and have to make a run by Safeway, which I hate doing for so many reasons. (Crowded & corporate for example). So, I googled "Trader Joes Recipes" and I found the perfect website: Trader Joes Fan. We have made a plethora of dishes from this website and the absolute best part, is that every single ingredient you will find at Traders. If you don't have a TJ in your state, you will still be able to find everything you need, but for our purposes, this will be strictly a Trader Joes recipe.

What you'll need:
-corn tortillas
-canola oil
-TJ super sweet baby bell peppers
-TJ greek plain (whole) yogurt
-TJ chili pepper sauce
-TJ english farmhouse cheddar cheese
-boneless chicken breasts
-fresh or dried cilantro
-Seasoning for chicken: paprika, sea salt, pepper, garlic powder, cumin
We cook a few breasts at once and keep some for leftovers to use again later in the week. (Quick and easy for the working couple!)
1. Put chicken on plate, dust lightly with all seasonings except salt (will dry out chicken) and garlic powder. Preheat oven to 350, then on stove, place chicken in medium/hot pan for 2-3 minutes on each side with a small amount of olive oil. Place in glass casserole dish or metal backing pan (on foil for easy clean-up), bake 7 minutes, add 1 cup water to pan (this is an amazing trick to keep chicken from drying out!), turn oven off and let cook for another 5-7 minutes. Be sure there's no pink water coming out of any of the chicken breasts, cut into it and check the center (or use a meat thermometer to make sure internal temp reaches 165). **Sounds like a lot of steps but there is nothing worse than dry, hard to chew chicken!**
2. Cut chicken into tiny chunks, place in bowl, season with garlic powder and sea salt and set aside
3. In separate bowl, mix about 2/3 cup Greek yogurt with 1 tbsp chili sauce. (I guess on these measurements and just look at the color of how spicy we want it), stir, set aside.
4. Put a generous amount of canola oil in medium heated pan. Place corn tortilla until slightly browned, flip over until slightly browned (less than a minute on each side usually). Remove from pan and fold in half immediately while placing on paper towel to absorb excess oil and to let dry. You can slightly season tortillas with garlic powder right after cooking if you'd like. (we are garlic lovers;) Set aside.
5. Chop baby bells into little pieces, chop or sprinkle cilantro and grate cheddar cheese.
6. Add all of your ingredients into shell and EAT! We have been putting the "Chipotle" (yogurt/chili sauce) mixture into the taco shell first, and then again on top of all the ingredients. The sauce is also a lot healthier than sour cream ;) You can definitely add cabbage, avocado, or any other ingredients you please. Enjoy!

September 10, 2011
Distressed Dresser
I have been SO excited to write this blog!! Antique/distressed wood furniture is very popular here in San Francisco. It starts with the Victorian and Edwardian homes that give our city it's signature feel and charm. Well, I was shopping in my favorite neighborhood of Noe Valley when we first moved here and I stumbled across the most adorable store, When Modern Was. The locally owned shop is filled with old dated 1900 dressers, tables, mirrors, clocks and more! Sometimes I think I should have been born in a different decade because I fell in love with every single piece they had. The prices are reasonable (Adam feels differently;) and the wood and paint jobs are gorgeous. SO, after talking Adam into buying a $300 dining table and drooling over the $700 dressers, we decided we would first try to refurbish and distress our own piece for much less. I researched for weeks on how to do this process and took several notes before we were raiding both Craigslist, for old wood furniture, and the hardware store. We found a $30 dresser, here are the before and after pictures: (silly me took the piece apart and started sanding before I took a photo but you get the gist!) You can click on each picture to see them in better detail!

 1. After you have found the wood piece you would like to re-do, the first step is sanding. As annoying as it may be, don't be tempted to skip this step! Proper sanding is essential to achieve an even, smooth surface that your paint will latch on to without chipping. I have read people using electric sanders, we do have one, but opted out because we found that doing it by hand gives you much more control. You can also bend and fold it to reach into awkward areas. Our purpose was to have the original color of the dresser show through when we got to our distressing step, so we sanded it very lightly to begin with. (Started with 80 grit paper and finished up with 120 to even out the surface). Once you've finished sanding, remove all the dust with an old rag to help the primer and paint stick to it. Also, don't forget to remove your hardware, you'll reattach everything at the end.
 2. Once you have prepped and cleaned up your piece, you've gotta prime it. You can buy a spray primer but we bought the brush on and painted it. Zinsser was the brand we used. We only did one coat which seemed to be efficient enough. Since we are aiming for a distressed look, it's ok if your wood shows through the primer. Luckily, distressing is very imperfect, there are no exact ways to do this! Be sure the primer is dry before painting. The primer we used was stark white, I think this varies a bit, but it seemed to work.
 3. Ok, now onto the fun part! We used a latex paint in a very light green color. These pictures are really hard to see, but it's a gorgeous green. We bought a quart of paint and barely put a dent in it, as it goes a very long way. Did I mention paint brushes? Don't cheap out them!!! We bought 2 brushes by the Purdy brand and spent about $15-$20 on them each. But they will last forever if you take care of them and they don't shed their bristles. We painted on 1 coat of paint, but there are several ways to do a paint job that we are going to try in future projects. (I have also read priming and painting with several thin coats works better at getting a smooth finish but again, we are distressing, so for our purposes we just "went with the flow" not really knowing what we were doing).
 4. Next, you'll want to wait at least 2 days for your dresser to dry. I was taking a vacation, so we waited 2 weeks. This will be hard for impatient people but I have read waiting the 2 days is a much better idea before distressing. So, 2 weeks later, I took 80 grit sand paper (lower the number, coarser the grit), and "willy nilly" sanded down the piece in areas that would naturally get more wear and tear. (Corners, where the shelves open, legs). I sanded down rough enough to have the dark original color of the dresser show through. We also took chains and beat up the top of the dresser along with using a hammer to chip away some of the paint. I used just my regular digital camera for these next photos which I will never do again, they didn't turn out as well.


 5. First, soak your brushes in a paint thinner to preserve the life of those expensive brushes. ;) Attach all of your hardware back onto the dresser and find a cute place for it in your home. :) We opted out to buying new hardware or painting over it, which you can do with spray paint. We liked the color and the "old" feel so we kept the originals. This is our very first project and I know with time, we will learn different techniques and find which ones work better than others. I will be sure to share our experience, as I know there are a lot of "crafties" out there! I should also mention that we didn't have any supplies when starting. We spent close to $100 on brushes, paint, primer, sand paper, etc. BUT we will be able to use most of these time and time again, and the paint/primer lasts so long. You gotta make that first big purchase but then you'll be able to start saving. :) Thanks for reading!!!


Subscribe to:
Posts (Atom)